Why Turn Off Your Conference Room Displays?
There’s something exciting about having sleek, digital calendar signs for our conference rooms. These conference room displays make it easy to see at a glance whether a room is available, streamline our booking process, and add a modern touch to our offices. But even as we enjoy these benefits, it quickly becomes clear that leaving these screens on 24/7 isn’t the best idea. Not only does it waste power, but it also causes unnecessary wear on the devices. That’s where custom power schedules come in! By tailoring when our displays are active, we can save energy, extend the lifespan of our devices, and ensure everything runs smoothly even when we’re not around.
Determining the Right Schedule for your Meeting Room Display
Before setting up a schedule for your conference room displays, it’s important to take a step back and understand how your rooms are actually used.
Understand your Scheduling Needs
Think about when your team is in the office and when the office is typically empty. Do you have a few people in the office who take early-morning calls? Do some people in your office have a habit of meeting at the end of the work-day? Maybe your office has a more alternative schedule, like a 4-day work week with Mondays as a work-from-home day. You might have the kind of office where the office empties out early on Friday afternoons.
Once you’ve got a handle on the usage patterns, consider the off-hours. Nights and weekends are obvious times when the displays don’t need to be on in most offices. But don’t forget about early mornings and late evenings if your office isn’t open then. Remember that the goal is to find those windows when dimming the displays won’t affect anyone’s productivity.
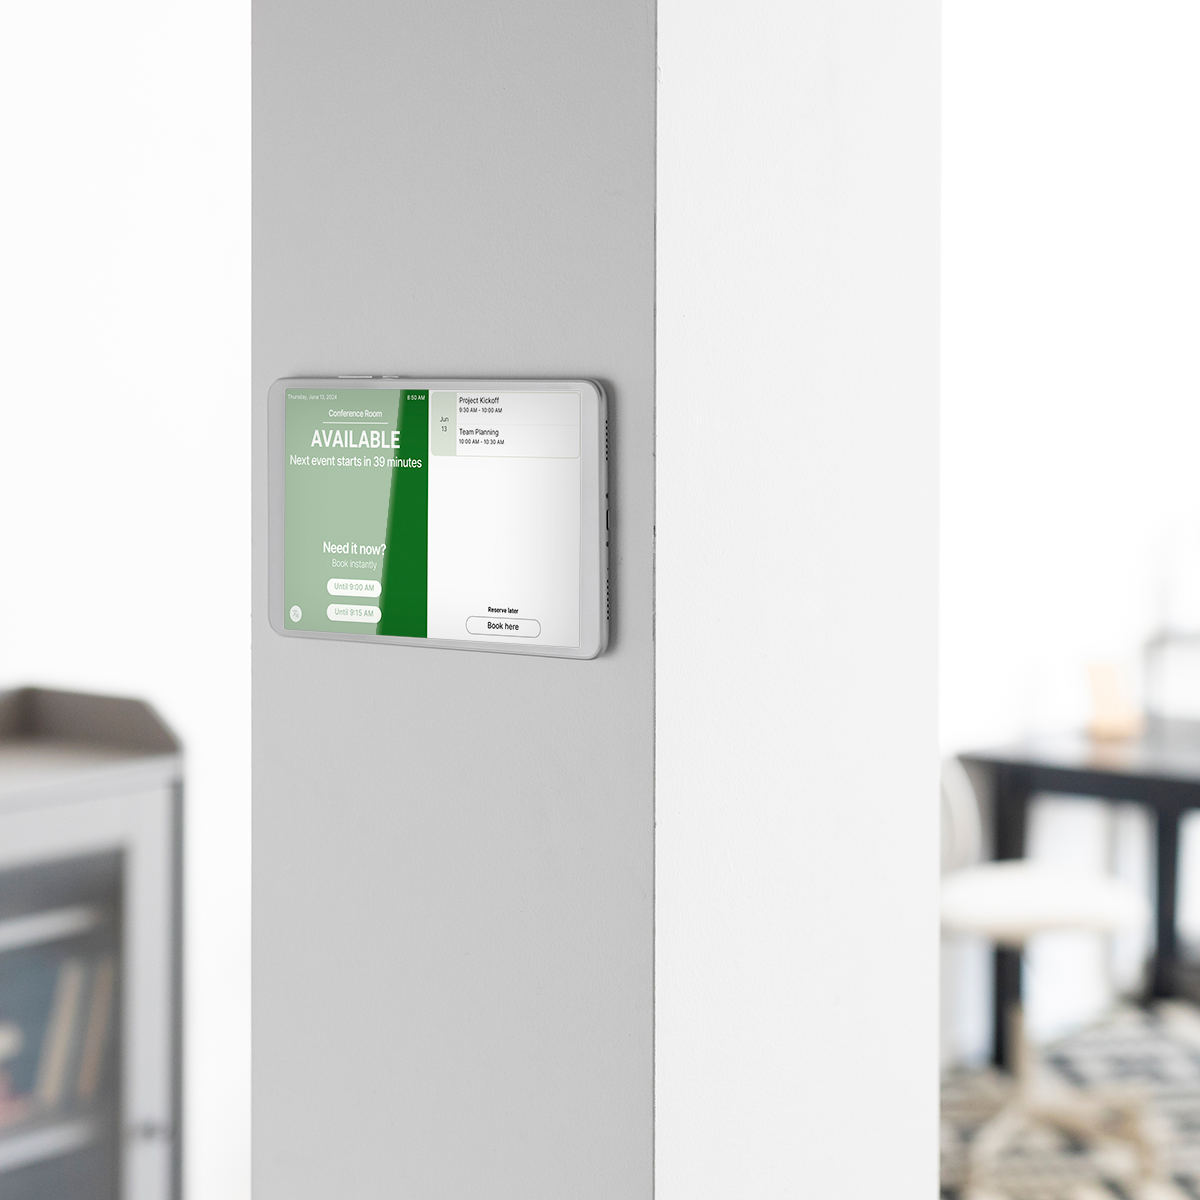
And don’t panic if you don’t get all of the signs on before the earliest of the early-birds makes it into the office. With the Room Sign App, all it takes is a gentle touch on the screen to temporarily wake up the conference room display, so no one is ever blocked from scheduling their meetings.
Best Practices for your Conference Room Displays
Creating an effective schedule for your conference room displays doesn’t have to be complicated. Here are some best practices to help you get started:
- Turn off the meeting room displays at night
- Turn off the meeting room displays on the weekends
- Look at your calendars to see the normal times when meetings start and end on a typical day
- Prioritize your people and their room booking experience
- Review the schedule seasonally to see if it needs adjusted for winter or summer schedules
As a general practice, we try and turn on our meeting room schedule displays 15 minutes before the typical start of our work day, and we turn them off about 30 minutes after the the typical end of our work day. We know that our people are much more likely to book an extra meeting in the afternoon than they are to arrive 30 minutes early. Of course, you can (and should) tailor your room display schedule to your own workspace.
Creating your Conference Room Display Schedule with the Room Sign App
The display scheduling tools in the Room Sign App dashboard were designed to be as simple as possible, while still giving you the control you might need for non-typical use-cases. In a normal setup, you will create one or more “Device Configuration” (found in the “Device Settings” section of the Dashboard). Each configuration has a section where you can tell the device when to turn the display to full brightness for the day and when to dim to the lowest brightness (“Device Screen On/Off Schedule” in the configuration).
Step-by-Step
- Log in to your Room Sign App Dashboard
- Navigate to the Device Settings section
- Choose an existing device configuration or create a new one
- For each day of the week, set the “On Time” (when the screen will be at full brightness) and the “Off Time” (when the screen will be dimmed)
- Save the configuration
Tips and Tricks
You can assign as many devices to a single configuration as you would like, which is helpful when all the conference room displays in a building should follow the same schedule.
You can create a separate configuration for every device if you want to, and this can be helpful you have unique scheduling requirements (like rooms that are only available on certain days of the week).
The schedule you set in the Device Configuration does not need to know about time-zones or daylight savings time. If you set a specific time-zone in your device configuration, that is the timezone that will be used on the device. If you do not set a time-zone, each device will default to their own time-zone and will follow the schedule as if it were created in that time zone. In short, if your schedule is set to wake up the devices at 8:00am, your device will wake up at 8:00am in whatever time zone it is set to. This is especially helpful when managing offices across timezones or when creating meeting displays that mirror remote offices.
Wrapping Up
Creating a custom power schedule for your conference room displays is a smart and simple way to save energy and extend the life of your devices. By understanding your office’s unique needs and following a few best practices, you can ensure your displays are active when needed and dimmed when they’re not. With the Room Sign App, setting up and managing these schedules is a breeze, helping you keep your meeting spaces running smoothly and efficiently.
So why wait? Start configuring your display schedules today and enjoy the benefits of a well-managed, energy-efficient office. Your team—and your budget—will thank you!
Ready for easy conference room displays?
Room Sign App makes it easy. Our app works with or without Google Calendar and Google Workspace, and our pricing is clear and transparent.