The Room Sign App offers a seamless solution for managing your room signage needs, whether you’re organizing meetings, events, or scheduling resources. Even without external calendars (Google Calendar or Google Workspace Resources), you can effectively utilize the Room Sign App’s built-in features to streamline your scheduling processes. Here’s a step-by-step guide to get started:
Creating Built-in Calendars:
1. Accessing the Dashboard: Log in to your Room Sign App account and navigate to the Dashboard.
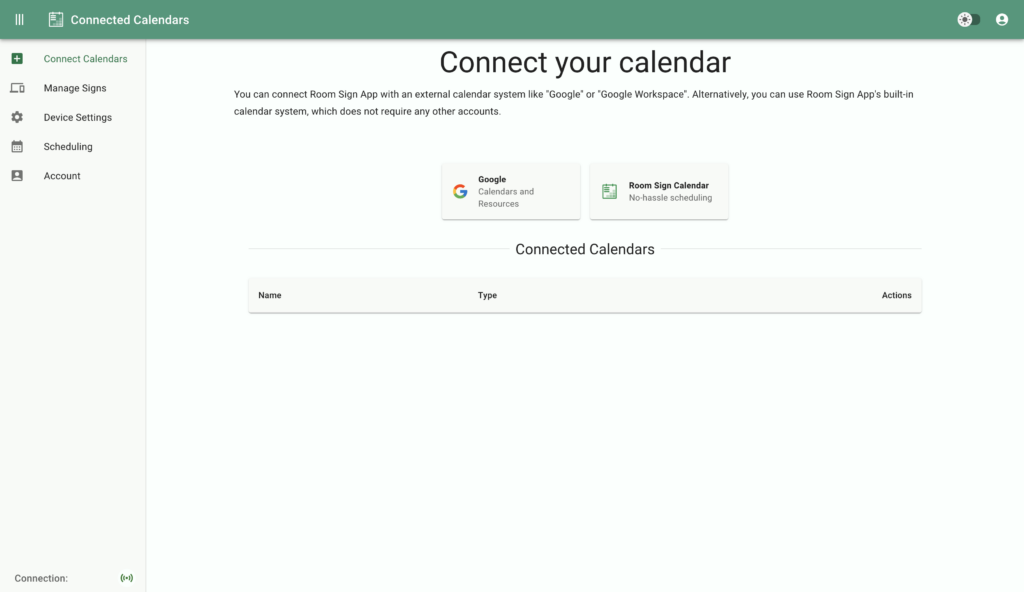
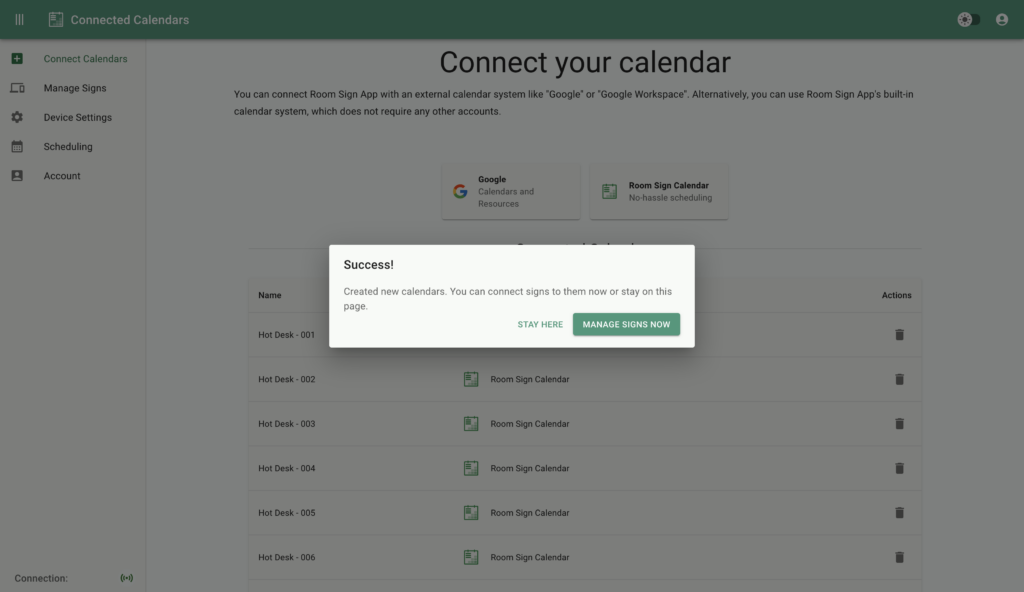
2. Connected Calendars: Under the “Connected Calendars” section, choose “Room Sign Calendar” to create a built-in calendar within the app.
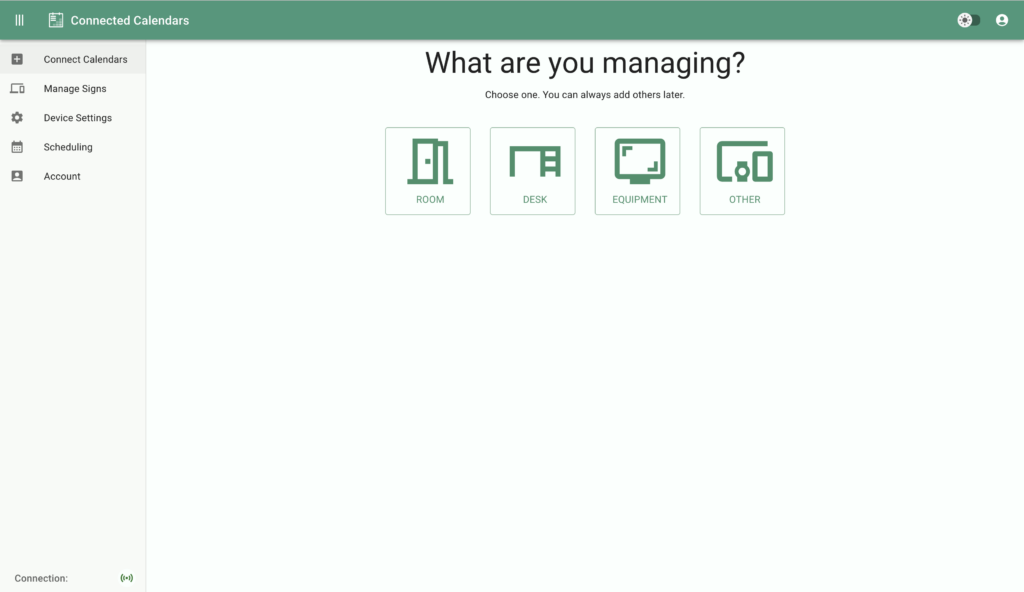
3. Selecting Calendar Category: Choose the appropriate category for your calendar, such as “Room”, “Desk”, “Equipment”, or create a custom category.
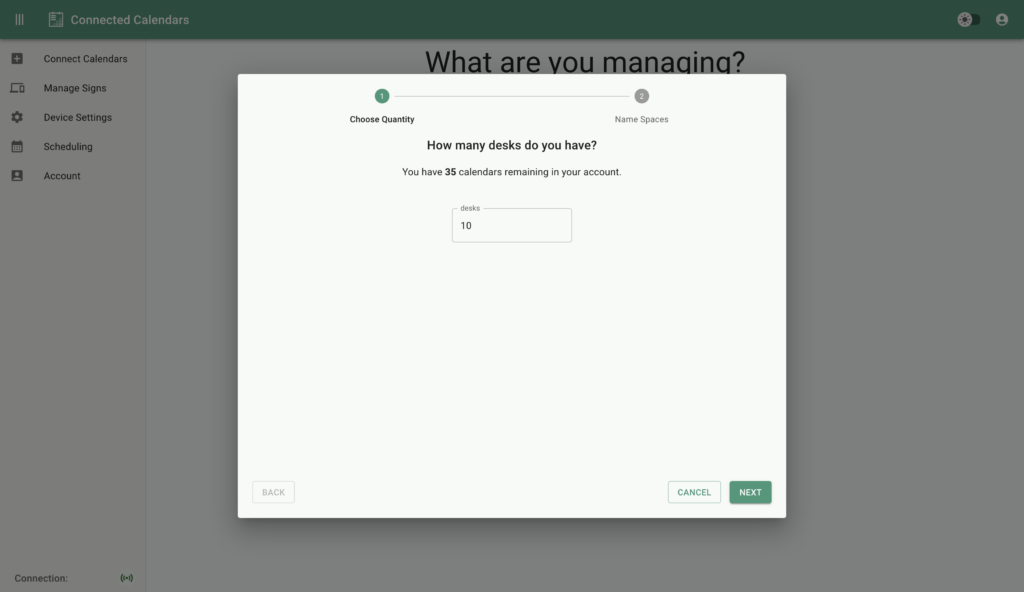
4. Number of Calendars: Specify the number of calendars you want to create within the chosen category.
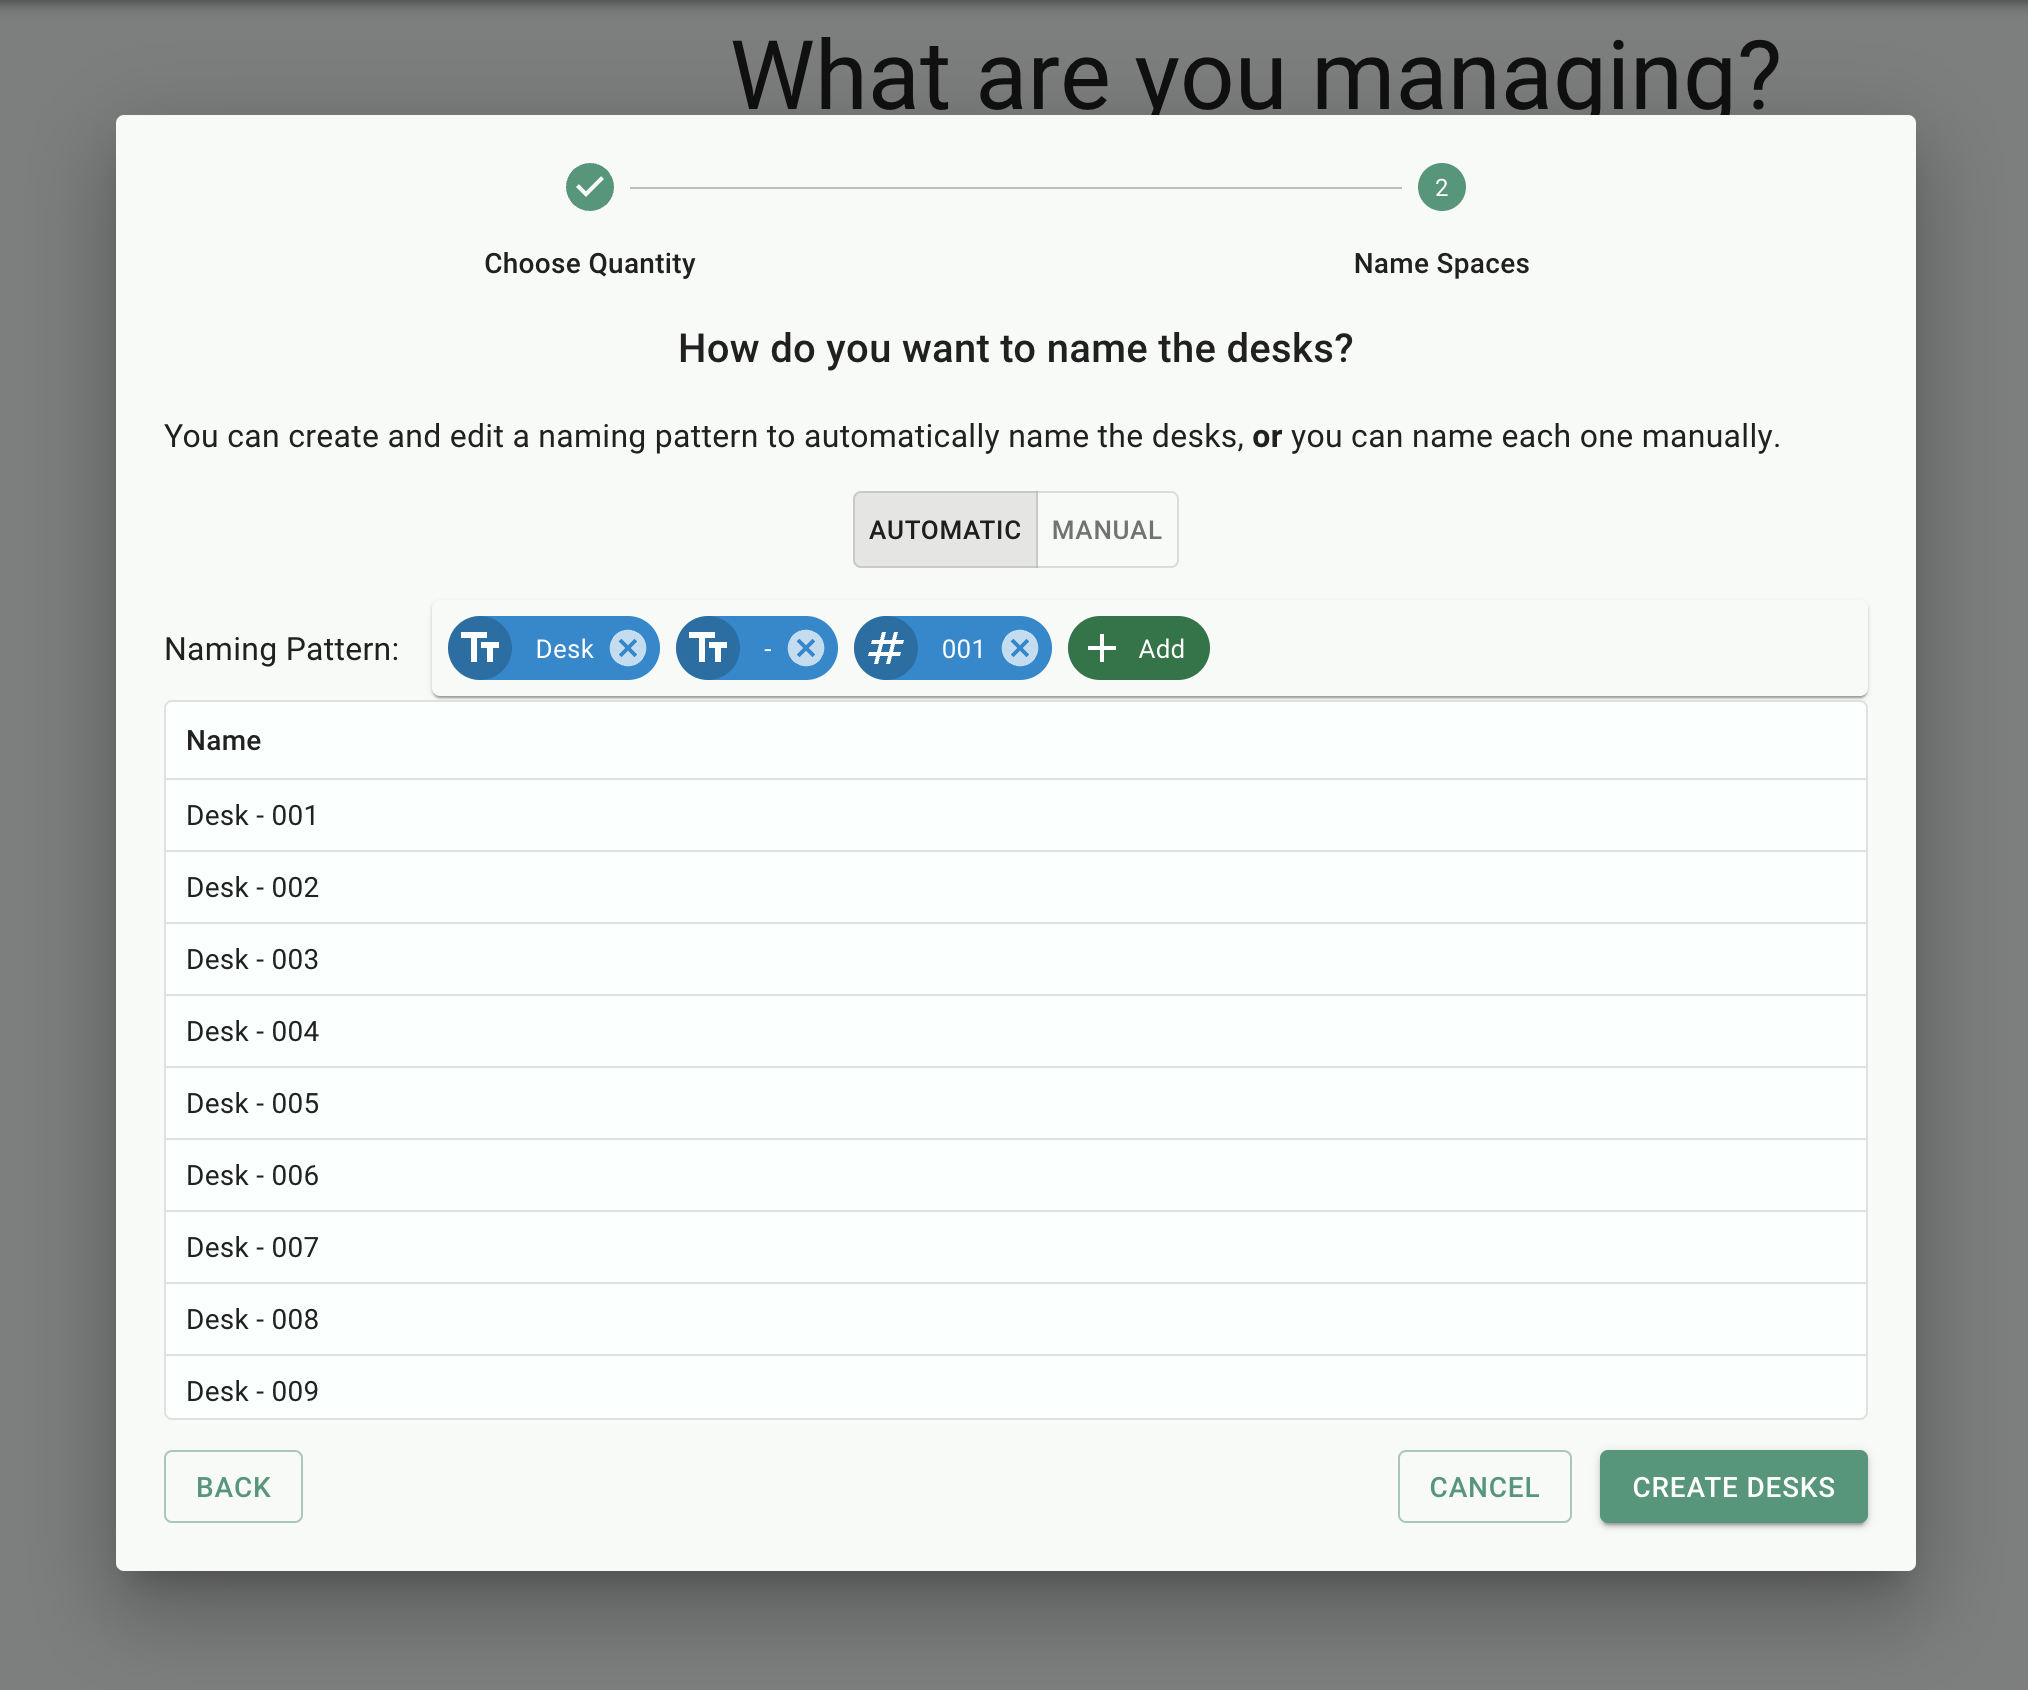
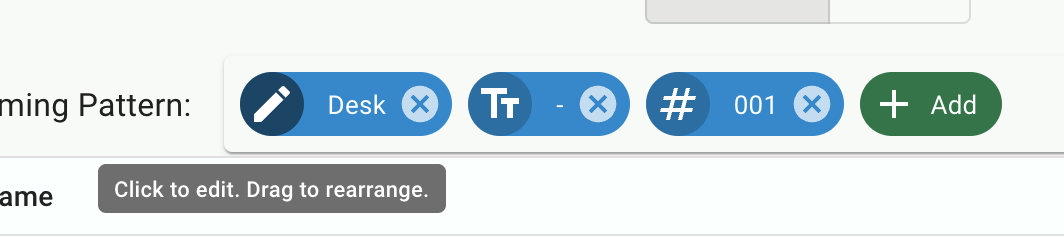
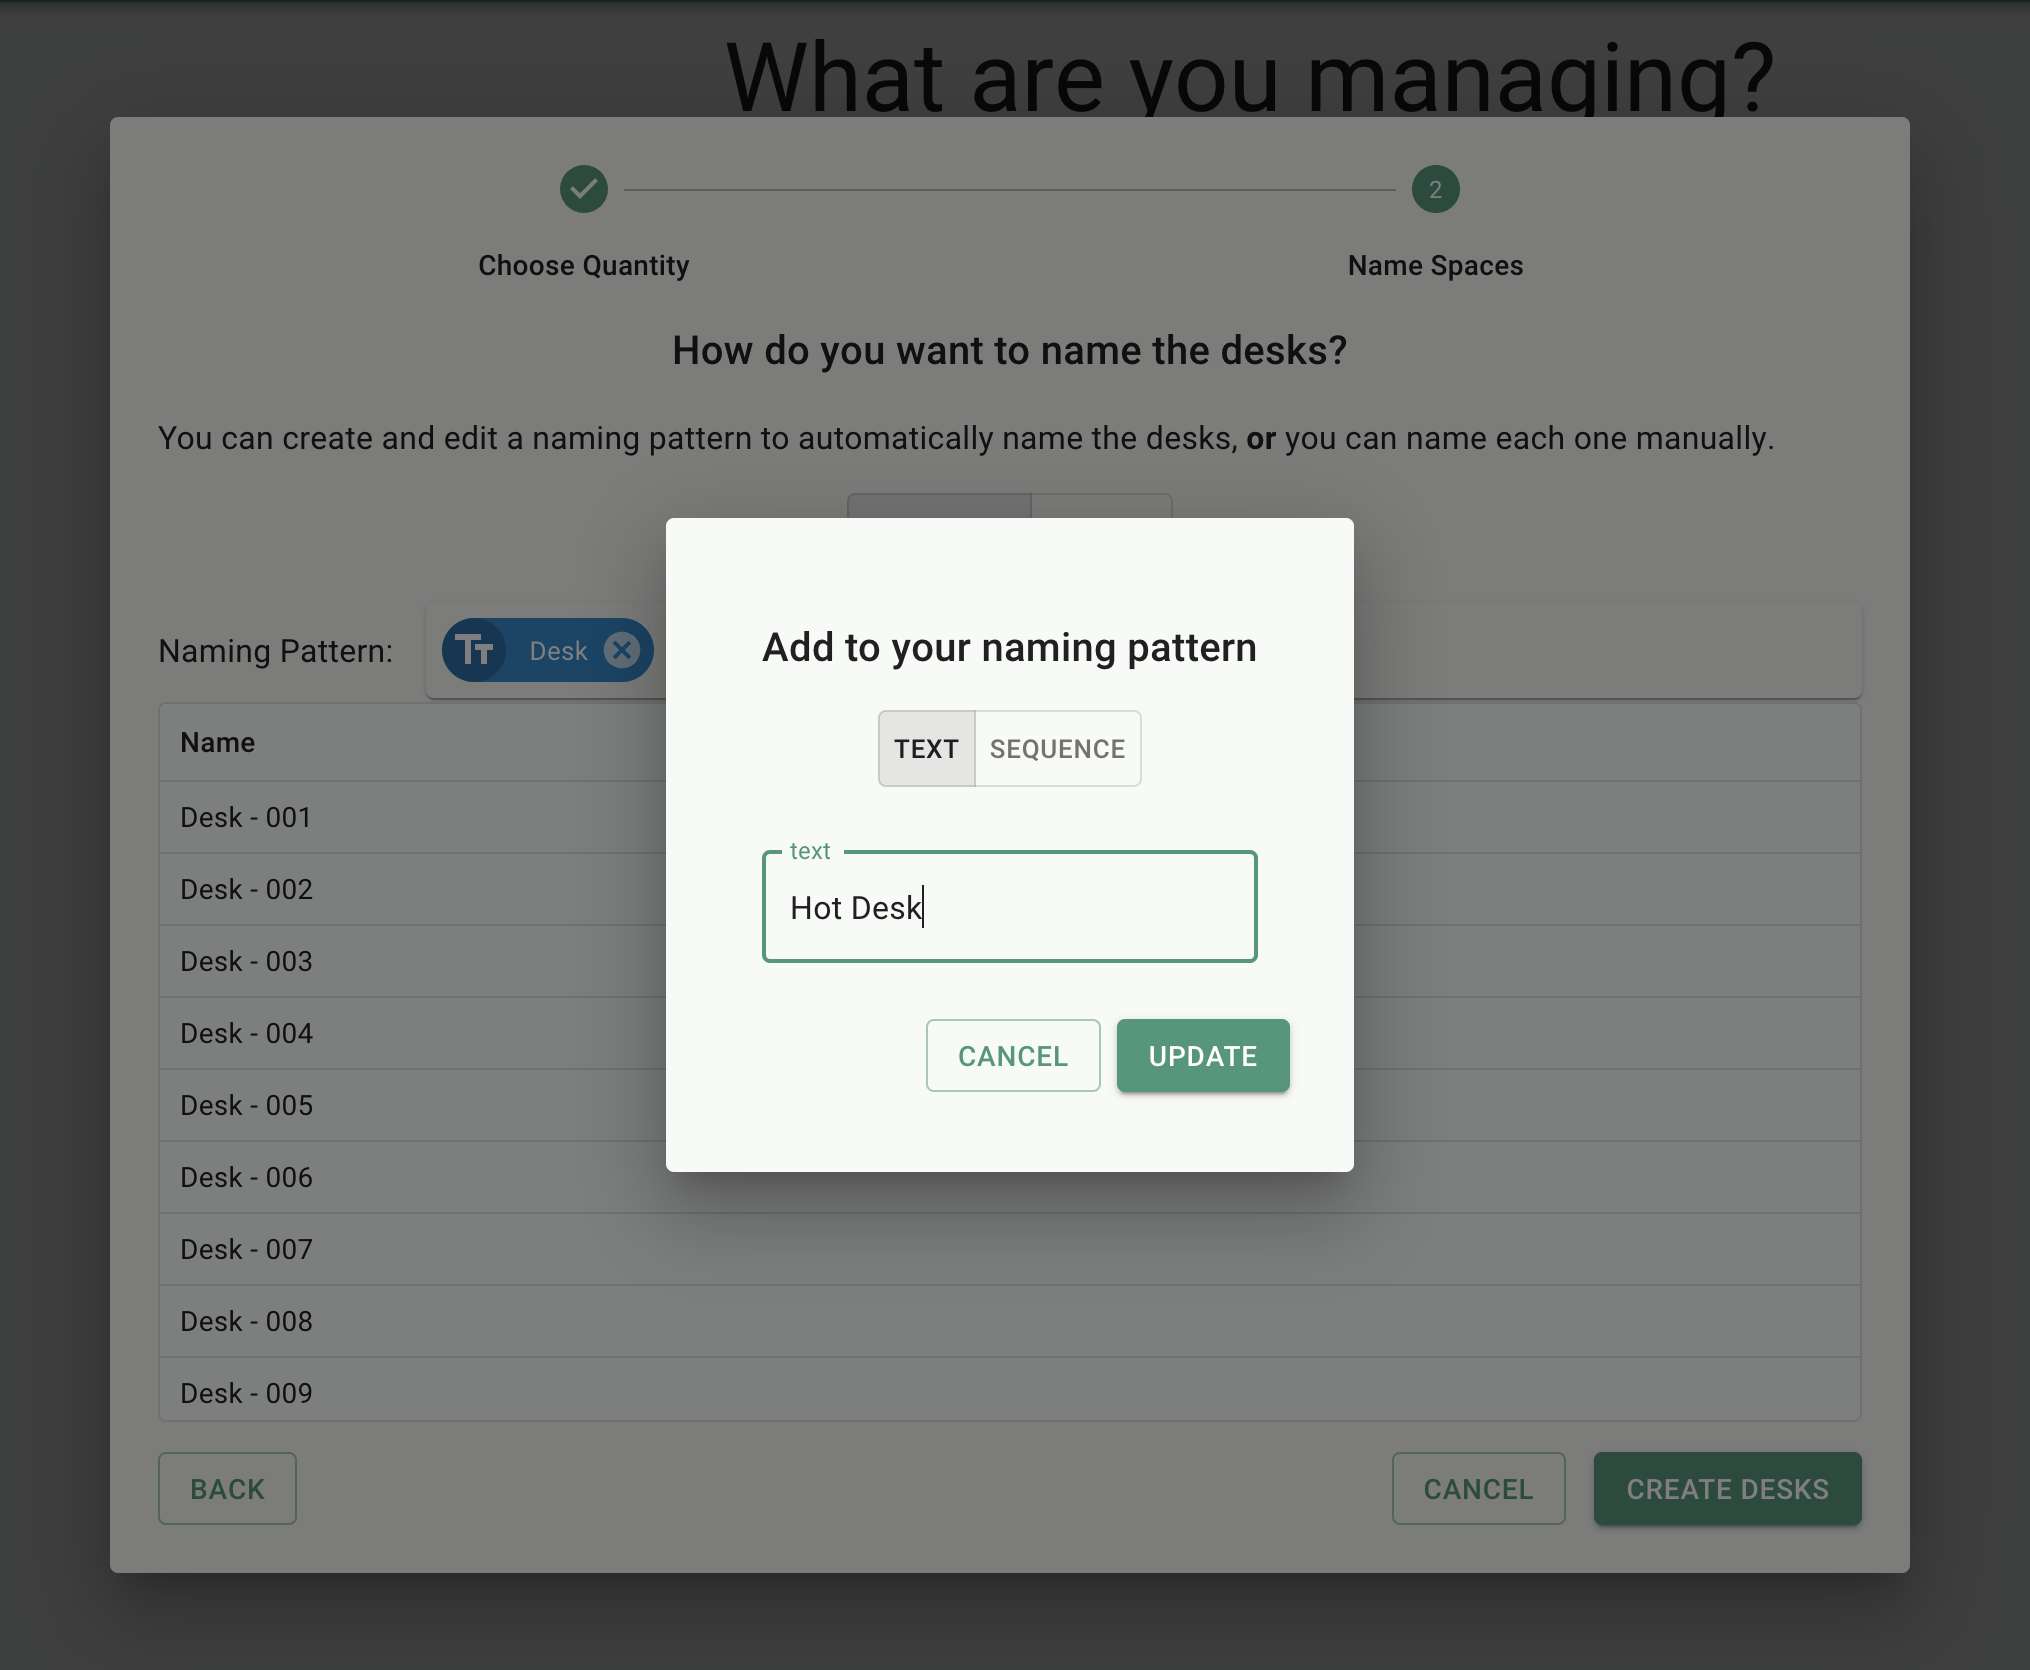
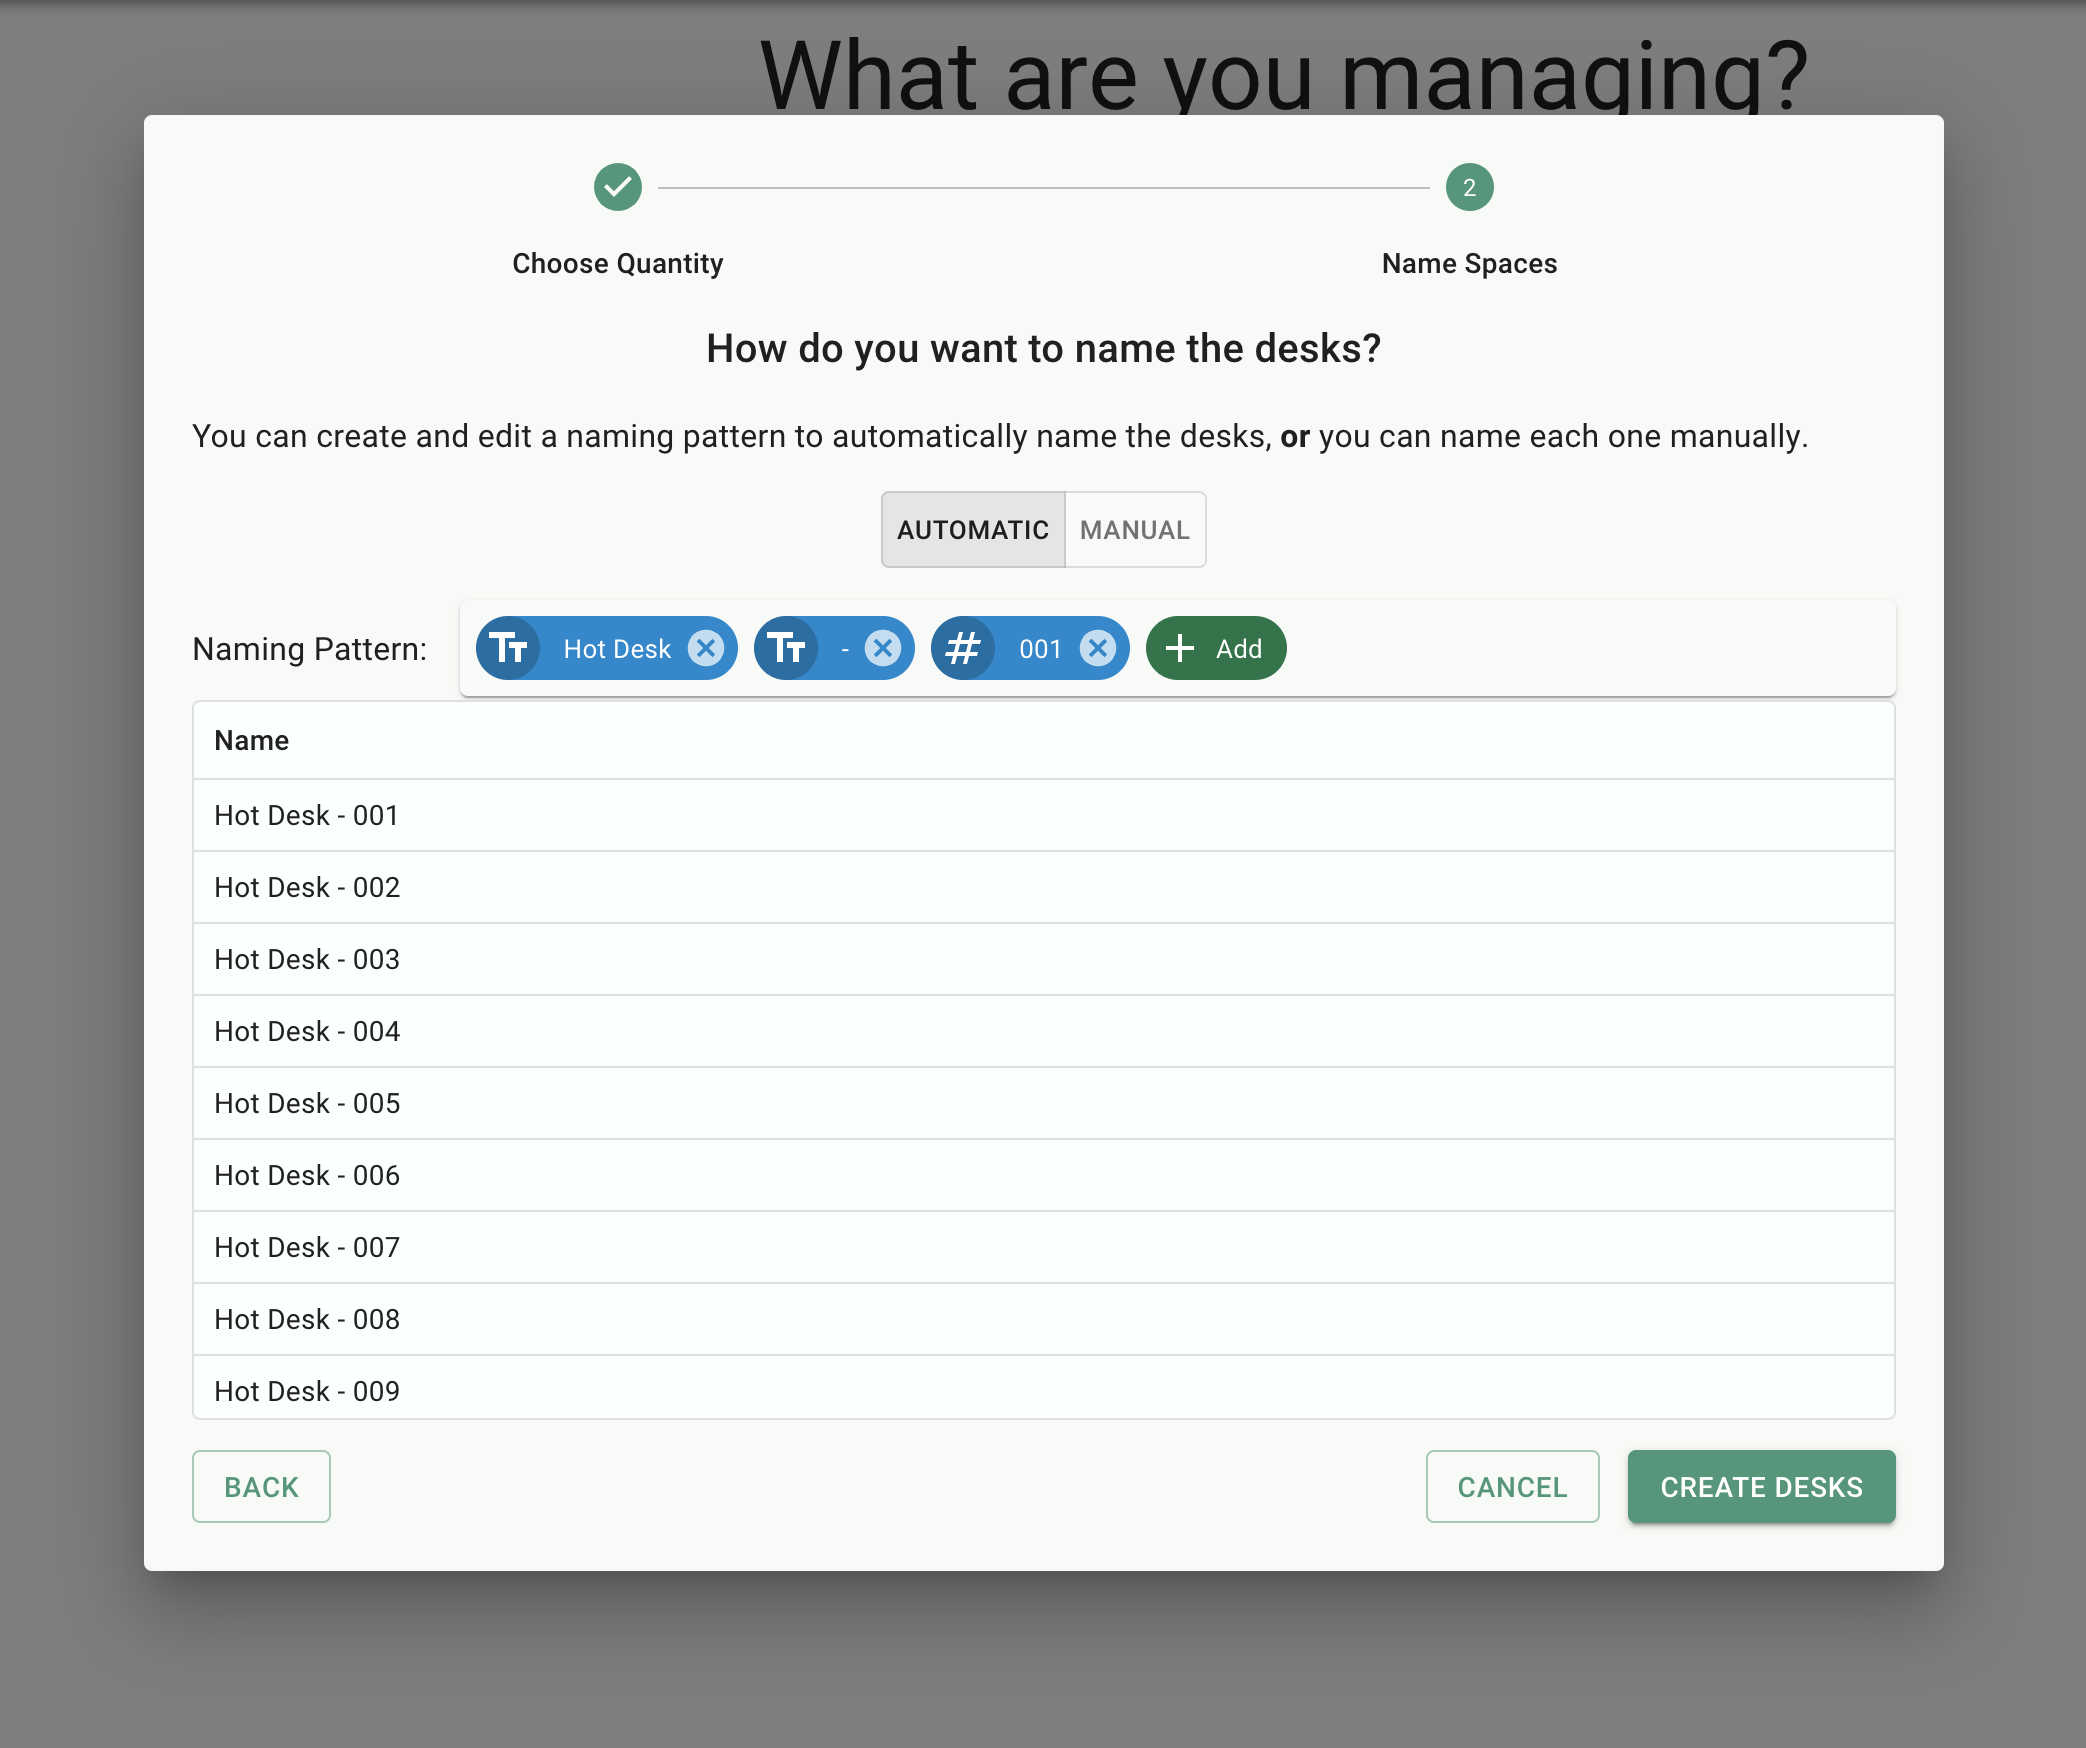
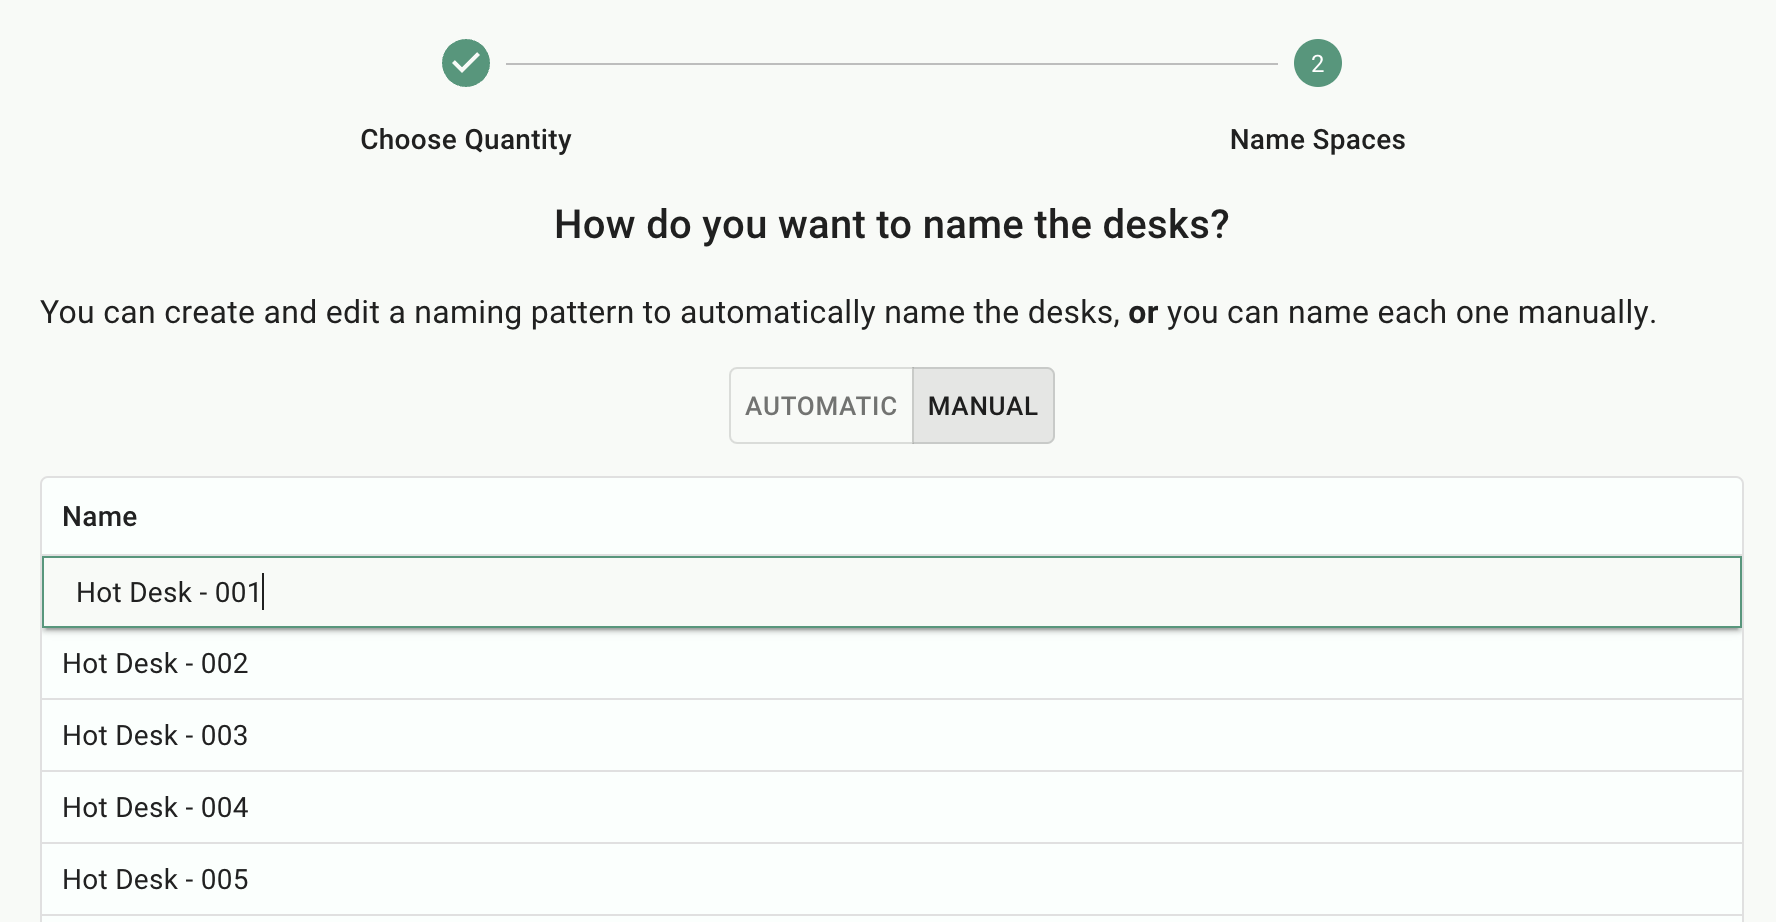
5. Customizing Calendar Names: Customize the names of the new calendars or maintain the default naming pattern.
6. Finalizing Creation: Complete the creation process and proceed to the sign management page.
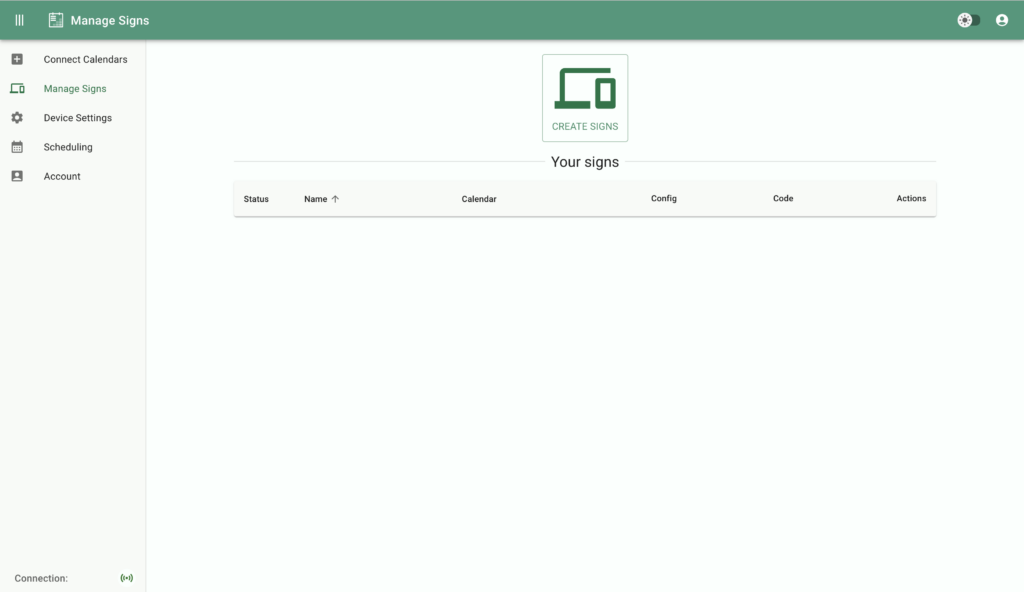
Managing Signs:
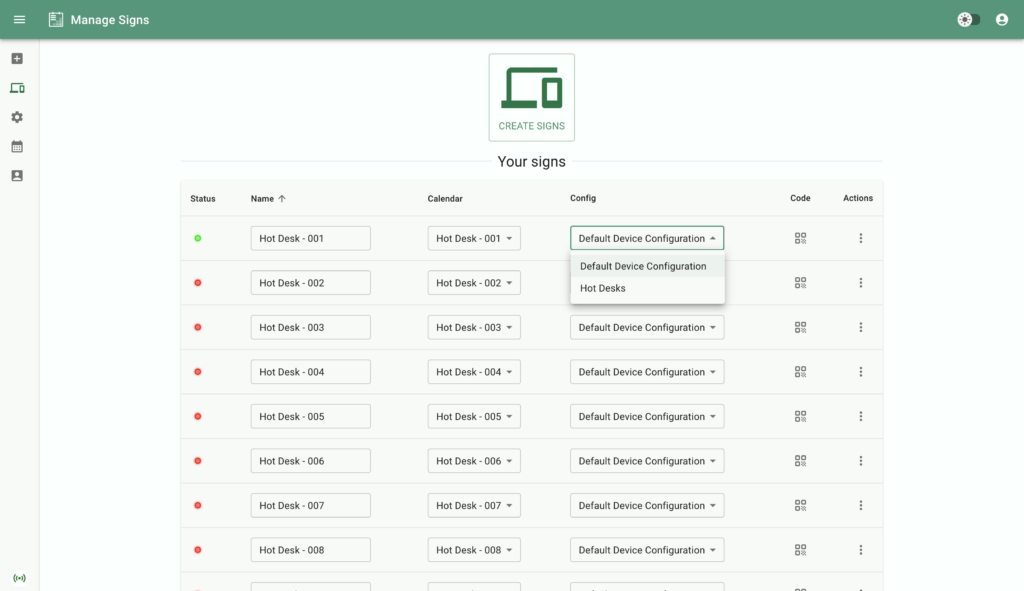
1. Create Signs: On the “Manage Signs” page, click on the “Create Signs” button.
2. Selecting Calendars: Choose the calendars you’ve created or connected with the Room Sign App.
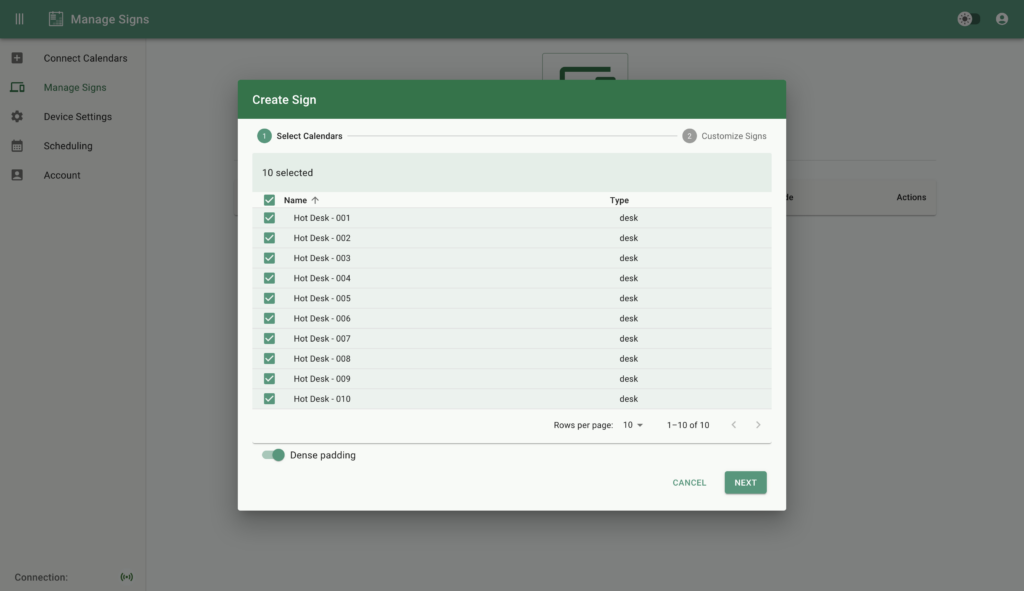
3. Naming Signs: Provide names for the signs corresponding to each calendar, customizing them as needed.

4. Configuring Settings: Select the desired settings option for each sign, such as default configurations or customized settings.
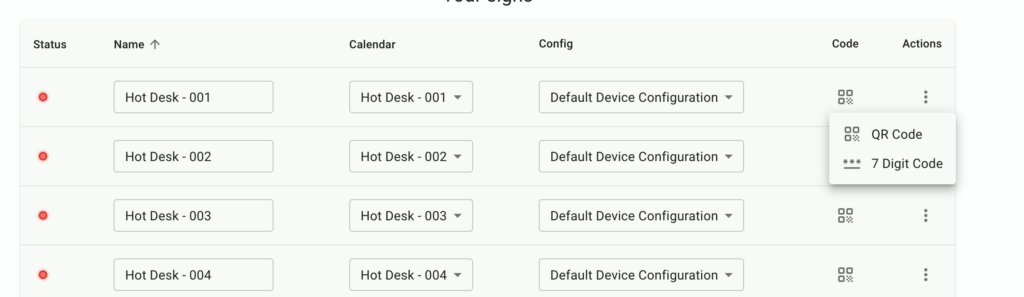
5. Completing Creation: Click “Next” to create the signs, which will appear in the “Signs” table with a “disconnected” status.
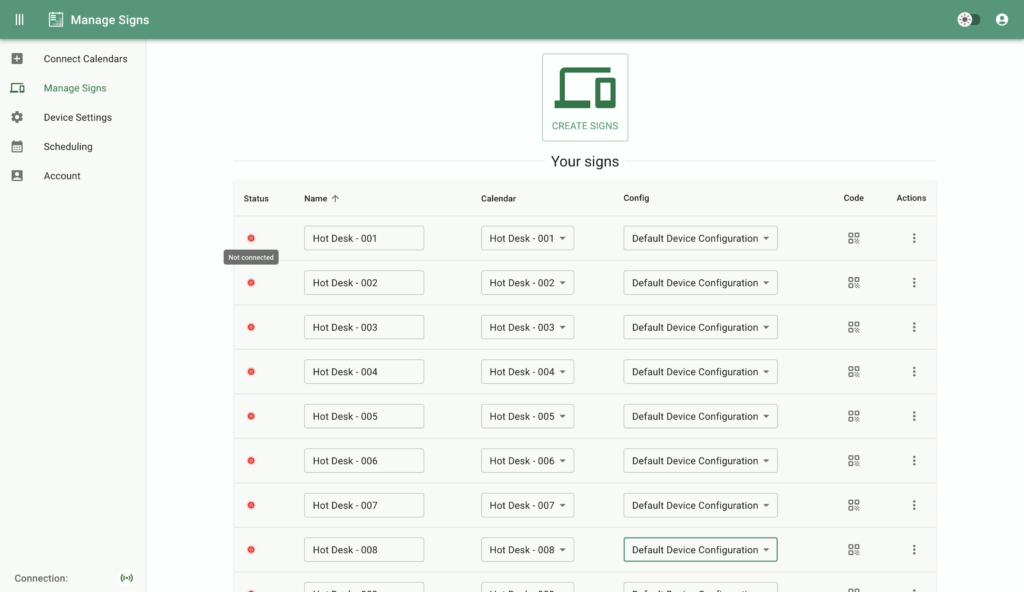
Registering Mobile Devices:
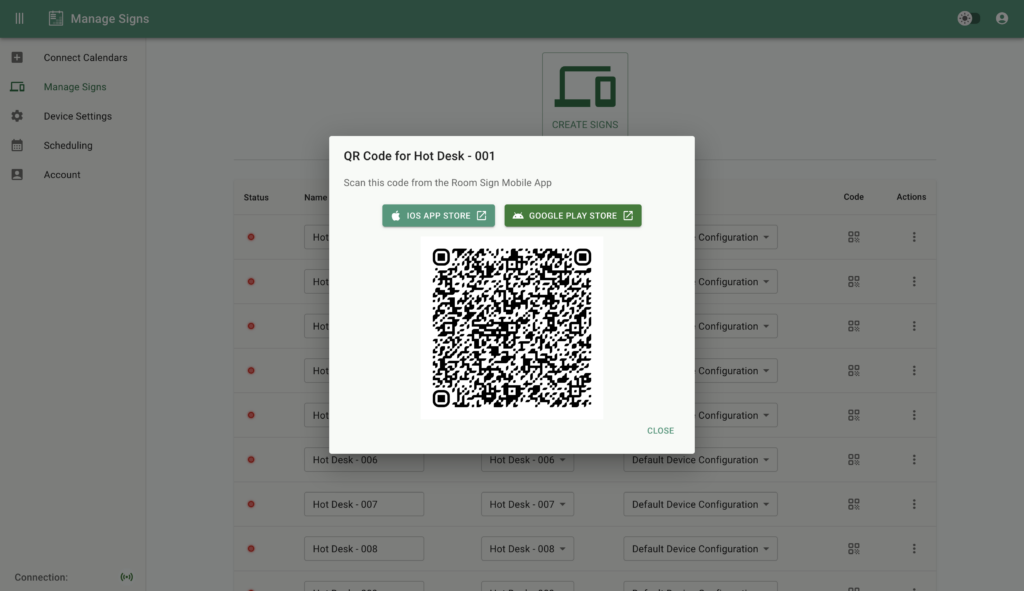
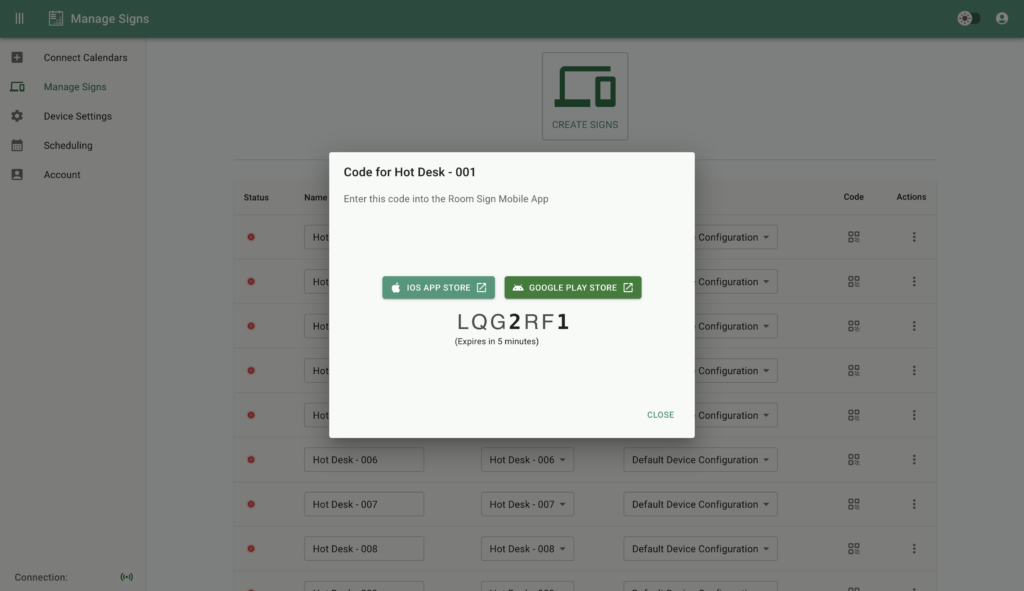
1. Using QR Code or 7 Digit Code: Access the code modal for each sign from the “Signs” table.
2. Scanning QR Code: In the Room Sign Mobile app, choose “Register Device” and scan the QR code to link the mobile device as the connected sign.
3. Entering Registration Code: Alternatively, enter the 7 Digit Code within the mobile app’s registration process.
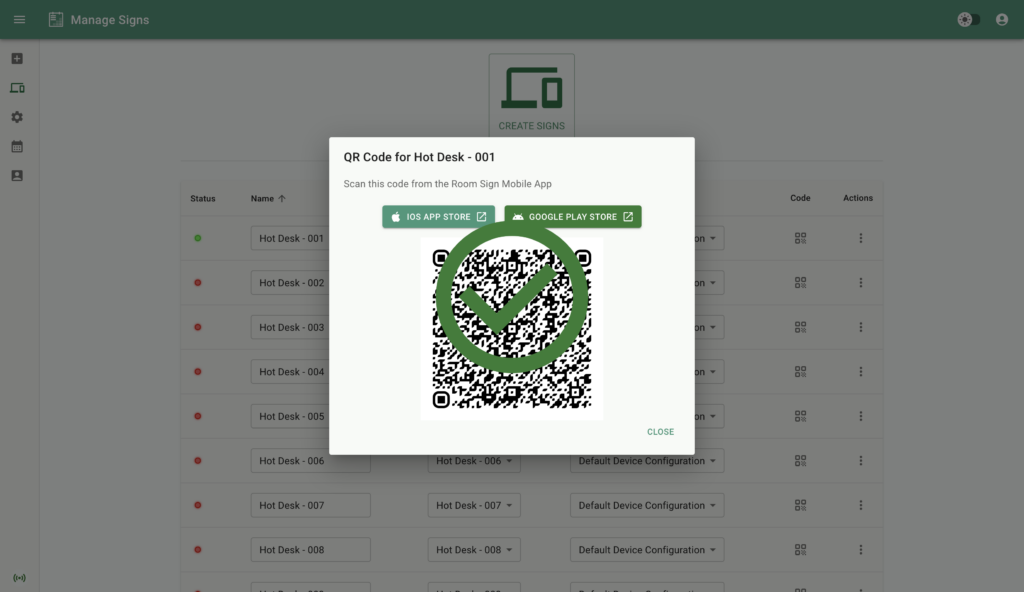
4. Confirmation: Once successfully connected, a green checkmark will appear over the code in the web app, indicating the sign’s status.
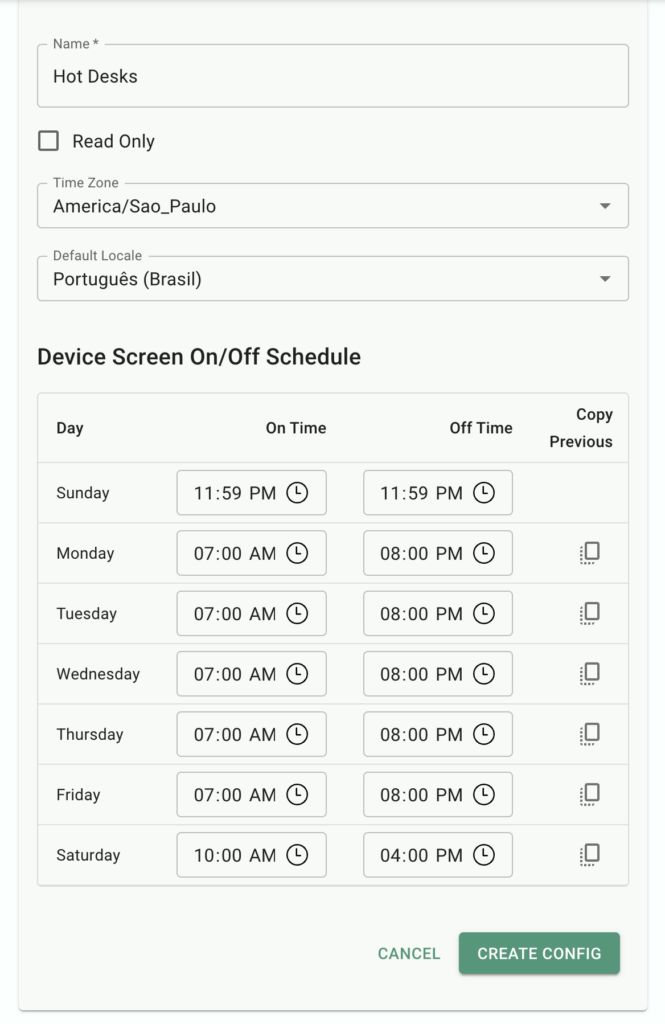
Customizing Device Settings:
1. Accessing Device Settings: Navigate to the “Device Settings” page to customize language, locale, or screen dimming schedule for the mobile app.
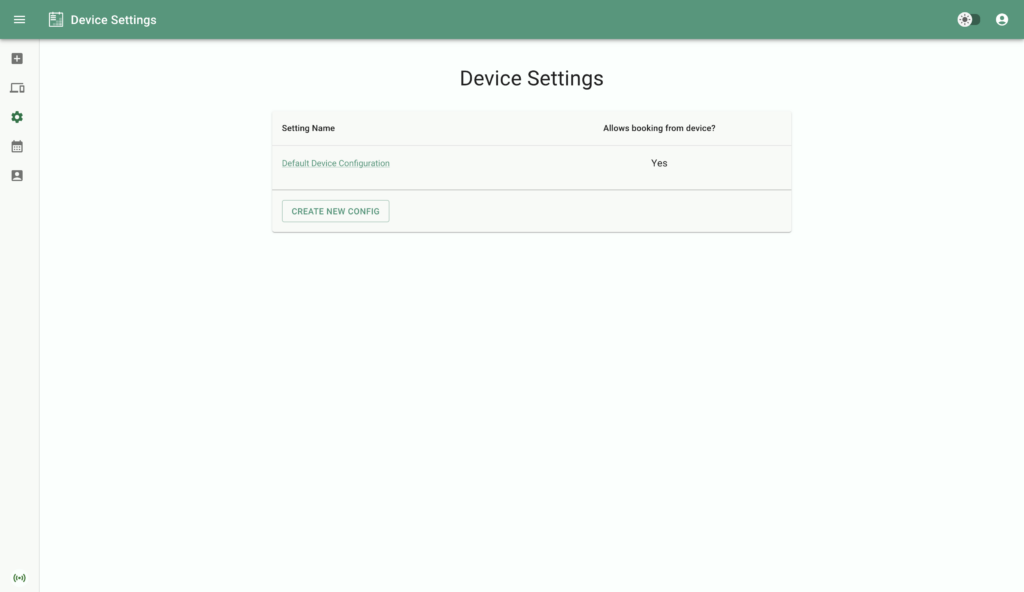
2. Editing Configurations: Modify default configurations or create new configurations to assign to devices as needed.
3. Update Devices: Change the configuration for any of your devices on the “Manage Device” page
With these simple steps, you can efficiently utilize the Room Sign App’s built-in calendar system to manage your room signage requirements without relying on external calendars. Whether you’re organizing meetings, reserving resources, or coordinating events, the Room Sign App provides a user-friendly solution tailored to your scheduling needs.
Next Steps for your Meeting Room Plan
Connect a Google Account for your Google Workspace Meeting Rooms
If you are already using Google Workspace for your buildings and rooms, it’s easy to connect them to the Room Sign App.
Set Up Contactless Scheduling with Shareable Links and QR Codes
Learn more about controlling access and sharing your calendars. If you don’t have tablets installed by your meeting rooms, QR codes and shareable links can help you get value from the Room Sign App right away. If you already have tablets, they can enable contactless scheduling and convenience in your spaces.
Ready to try simple meeting room management software?
Sign up and get started in minutes. Trial our software and see the value for yourself!